Pages

Thursday 3 November 2011

Carrot Cake With Cream Cheese Frosting

I'm in a rush today so I'm going to keep this post short and sweet!Was browsing through Lorraine Pascale's first book Baking Made Easy at the weekend and I came across this carrot cake which I made last Easter.I instantly remembered how much of a hit it was with the family so I decided carrot cake would be on the cards for that evening.Lorraine's recipe make a massive three layer 9 inch cake and even though everyone loves this cake I knew that would simply be too big so I scaled it down to a 2 layer cake.The cake comes together very quickly,the only bit of work required is for grating the carrots.I doubled the frosting quantities as I like to frost the sides of my cake as well as the top and middle.In a nutshell,this cake was delicious.The sponges were so soft and moist and the frosting was to die for!I also found the cake lasted for days and still retained its flavour and moistness.The recipe given below is for the original 3 layer 9 inch cake and the frosting recipe given makes just enough to frost between the layers and the top of the cake.

Makes one 3 layer 9inch(23cm)cake

For The Sponges
525ml(18 1/2 fl oz) vegetable oil
9 eggs,lightly beaten
525g(1 lb 3 oz)soft dark brown sugar
420g(15oz) carrots,peeled & grated
Grated zest 3 large oranges
525g(1 lb 3 oz)self raising flour
Pinch of salt
1 tbsp bicarbonate of soda
1 1/2 tbsp mixed spice
Seeds of 1 vanilla pod or 2 drops vanilla extract

Cream Cheese Frosting
200g(7oz) icing sugar
40g(1 1/2 oz)butter,cubed
Finely grated zest of 1 lemon
Seeds of 1/2 vanilla pod or 1 drop vanilla extract
115g(4 1/2 oz)low-fat cream cheese,chilled
Handful of pecans or walnuts to decorate

1.Preheat the oven to 180C(325F),Gas mark 4.Prepare the tins by oiling the insides and lining the bases with baking parchment.
2.Put the oil,eggs,sugar,carrots and orange zest in a large bowl and mix with a wooden spoon.
3.Mix the flour,salt,bicarbonate of soda and mixed spice together,then sift into the wet mixture.Add the vanilla and lightly mix until the mixture is uniform but still soft and runny.
4.Pour into the prepared tins and bake in the oven for 40-45 minutes.Check after 30 minutes as ovens vary(mine were done in 30 minutes).The cakes are ready when the sponge springs back when lightly pressed.A skewer inserted into the middle should come out clean.Leave to cool for 5 minutes or so,then turn out onto a wire rack and peel off the baking paper.
5.For the cream cheese frosting,mix the icing sugar,butter,lemon zest and vanilla together in a bowl,then whisk well to combine.Stir in the cream cheese.If the mixture looks a little runny put it in the fridge to firm up for 10-12 minutes.
6.When the cakes are cool,place one one a serving plate and top with some of the cream cheese frosting.Place a second cake on top and spread some more of the frosting on this.Finally top with the third cake and spread the remaining frosting on top.Finish with walnuts or pecans if desired.

Sunday 23 October 2011

Simple Victoria Sponge

I love watching food programmes,they're really the only thing I watch on tv anymore.One of my all time favourties has to be The Great British Bake Off which is unfortunately now finished.When I saw that a book had been realeased to accompany the series I knew I had to get it.I ordered it on Amazon and within a few days I was leafing through the hundreds of recipes choosing which to make first.
The book is packed full of recipes many of which are detailed and long.I normally love to challange myself with a more difficult recipe,but when I saw that the first recipe was for the perfect Victoria Sponge,I changed my mind.There is something about a Victoria Sponge that is so appealing.If made correctly,it's light,moist and most importantly declicious.
I followed the method exactly for this recipe,taking my time beating the butter and sugar and when folding in the flour.Even with taking extra care to do everything to the letter,this cake still comes together in no time.Before I knew it,the smell of a freshly baked sponge was wafting through my kitchen.Once cooled,I whipped some double cream until stiff.I spread one sponge with a generous amount of raspberry jam and then topped with the thick cream,and finally the second sponge.Dusted with icing sugar and the cake was complete.I couldn't wait to dig in and thankfully I wasn't dissapointed.The sponge combined with the cream and jam was just perfect.

Sponge
225g butter,softened
225g caster sugar
4 eggs
1/2 tsp vanilla extract
225g self raising flour,sifted
1 tbsp milk

Filling
300ml double cream
30g icing sugar
Raspberry/Strawberry jam
Icing sugar,to finish

1.Preheat the oven to 180C.Grease and line the bases of two 20cm(8in)sandwich tins.
2.Beat the softened butter for a couple of minutes,until creamy and light in colour.Gradually add in the sugar and continue beating for 3 to 4 minutes until fluffy and light in colour.
3.Break the 4 eggs into a bowl with the vanilla extract.Beat briefly with a fork just to break the eggs up.Gradually beat the eggs into the butter and sugar mixture.If the mixture begins to look curdled add a tablespoon of the sifted flour and continue as before.
4.Take the previously sifted flour and sift again,this time over the sponge.Add the tablespoon of milk and fold these through the mixture,taking care not to knock out any air you have incorporated.
5.Divide the mixture evenly between the prepared tins and place in the oven to bake for 20-25 minutes.The sponges are cooked when they are a good golden brown and spring back lightly when pressed.Insert a skewer into the middle cakes and make sure it comes out clean.
6.Allow to cool for a minute or two and then invert onto a wire rack to cool completely.Beat the cream with the icing sugar until quite stiff.
7.Once the sponges are cold,place one onto a serving plate.Spread with a generous amount of jam and then top with the stiffly whipped cream.Place the other sponge on top and finish with a dusting of icing sugar.

Tuesday 18 October 2011

Chocolate Cake

I usually make it my business to never let it go any longer than one week before I post but unfortunately last weekend between one thing and another I just ran out of time.So this post is a little later than usual but trust me this cake is worth the wait ;)With the evenings getting shorter by the minute and the weather getting noticeably colder,this cake is comfort food personified.Three layers of moist,chocolaty sponge covered in a silky smooth chocolate ganache.
I'd be lying if I told you I wasn't easy to please when it comes to desserts,or anything sweet now that I come to think of it.But I'm not exaggerating when I tell you that this really is one of the nicest chocolate cakes I have tried so far.And believe me I've tried many.This sponge is so moist,with a slight fudgy texture and it offers a full on chocolate flavour.The ganache is thick and smooth and pairs wonderfully with the cake.One slice of this cake and I knew it was my new go to recipe for when I'm craving something chocolate.

This was the third recipe I've tried from Edd Kimber's new book The Boy Who Bakes and once again the book has delivered.I seriously recommend this book to anyone with an interest in baking-his recipes all look to die for and I'm sure I'll be trying out many more in the coming weeks.Although this cake may look like it took a long time,it was actually surprisingly easy.The ganache is also so simple to apply,I wouldn't say it took me more than 15 minutes to assemble the cooled cakes.

Sponge
110 g unsalted butter,room temp.
110g plain chocolate(60-70%)
280ml boiling water
3 Tbsp cocoa powder
140 ml buttermilk
280g plain flour
2 Tsp bicarbonate of soda
1/2 tsp salt
340g soft brown sugar
2 tsp vanilla extract
3 eggs,lightly beaten

Ganache
225g butter
285g plain chocolate(60-70%)
2 Tbsp golden syrup
240ml double cream
1.Preheat the oven to 180C(160C fan)gas mark 4.Grease and line three 20cm round cake tins with baking parchment,then grease the parchment too.Melt the chocolate in a microwave or in a bowl set over a pan of gently simmering water,making sure the base of the bowl doesn't touch the water.Set aside to cool slightly.Whisk the cocoa powder with the boiling water in a separate bowl.Whisk in the buttermilk and set aside.
2.Sift the flour,bicarbonate of soda and salt together into a bowl.In a separate bowl use an electric hand mixer to beat the butter,sugar,eggs and vanilla until light and fluffy,about 5 minutes.Beat in the eggs,a little at a time,beating until fully combined.With the mixer on low,pour the cooled chocolate down the side of the bowl and once fully combined,add a third of the flour mixture followed by half the buttermilk mixture.Repeat and then add the final third of the flour mixture.Divide equally among the tins and bake for 25-30 minutes or until a skewer inserted comes out clean.Cool in the tins for 10 minutes before inverting onto wire racks to cool completely.
3.To make the ganache,melt the butter,chocolate and golden syrup in the microwave or heatproof bowl over a pan of gently simmering water.Once melted and smooth,add the cream and mix to combine.Remove from the heat and allow to set until spreadable,about 15-20 minutes.If the ganache is not setting at room temperature you can refrigerate it,but watch carefully that it stays spreadable.
4.To assemble the cake,put the first layer of cake on a serving plate and spread the top with a layer of ganache.Then place the second layer of cake on top and spread this with a layer of ganache.Finally place the third cake layer on top and cover the whole top and sides of the cake with the remaining ganache.

Sunday 9 October 2011

Streusel Apple Pie

I don't know about you but I really feel Winter has arrived.I know that technically it's still Autumn but I'm a cold person by nature so I'm already really feeling the cold.There's so many things about Winter that I hate:the bitter cold,the dull,dark sky,the constant rain,the shorter days,the fact that one is almost completely confined to the house...the list is endless!But then again there are many things I love about Winter but the main one has to be Winter baking.I can't think of anything more inviting than spending my weekends trapped in my cosy kitchen working on an exciting new recipe.Personally I think Winter baking allows you to experiment with trickier recipes as I always seem to have a whole day to complete a recipe.
Apples are in season at the moment so for that reason I was searching around for an interesting recipe involving apples this week.I recently got Edd Kimber's new book The Boy Who Bakes and I spotted an interesting recipe comprised of a pastry base a cinnamon flavoured apple filling and a crumbly streusel topping.I spent most of my day working on this recipe from making the shortcrust pastry right down to the streusel topping.This by no means came together in a matter of minutes and if your looking for something quick to satisfy your sweet craving then this certainly isn't what you're looking for.But if your looking for something to spend your day slowly working through with a delicious rewarding result then this certainly fits the bill.The shortcrust base is just he right crumbly texture and isn't overly sweet.The apple filling is flavoured with cinnamon,ginger and nutmeg giving it that little extra something and the streusel topping is a lovely sweet finish to the pie.I would definitely recommend this for anyone looking to make an apple inspired recipe this week.

Shortcrust Pastry
125g unsalted butter,diced and chilled
200g plain flour
1/2 teaspoon salt
35-60ml ice cold water

Streusel Topping
140g plain flour
100g caster sugar
110g butter

For The Filling
1.3kg eating apples(granny smith)
1 tsp lemon juice
15g caster sugar
1 1/2 tsp cinnamon
1/2 tsp nutmeg
1/2 tsp ground ginger
3 tbsps flour
pinch of salt
15g butter,small pieces

1.Begin with the shortcrust pastry.In a large bowl rub the butter into the flour and salt with your fingertips or using a pastry blender,until you have irregular breadcrumbs.Add half the water and mix until the mixture starts to come together,adding more water if the mixture is too dry.Place onto a work surface and using the heel of your hand,press and smear the dough across the work surface a few times,then gather it together and form into a flat round.Wrap in clingfilm and chill for 30 minutes.Alternatively this can be done using a food processor and then smearing across the work surface as mentioned above.
2.While the pastry is chilling make the streusel topping.Sieve the flour and sugar into a bowl and then rub in the butter using your fingertips.Gather the dough together then chill until needed.
3.Lightly flour the work surface and rolling pin,and roll out the chilled shortcrust pastry to fit a 23cm(9in) pie dish.Line with the dough and trim any excess leaving a 2.5cm overhang.Roll the excess pastry under itself to form the pie's edge.Crimp the pie's edge using your fingertips.Chill for 30 minutes.Preheat the oven to 200C(180C Fan)gas mark 6.
3.Line the prepared pastry shell with baking parchment and fill with a layer of baking beans or rice.Bake for 20 minutes.Remove the baking beans and baking parchment,then bake for a further 10 minutes or until the pie begins to turn golden.
4.To make the filling,peel,core and slice the apples,then put them in a large bowl with the lemon juice,sugar,cinnamon,nutmeg,ginger,flour and salt.Mix well.
5.Add the filling to the pastry shell and dot with the butter.Bake for 15 minutes,then open the oven reduce the temperature to 180C(160 Fan)gas mark 4.Break the streusel topping into little pieces and spread it across the top of the pie.Bake for another 45-50 minutes or until the filling is bubbling and the pastry golden.Allow to cool for 20-30 minutes.

Thursday 29 September 2011

Chocolate Fondant & A Long Weekend


If you have work or school tomorrow then I would advise you to stop reading now.I'd hate to make you jealous.Luckily for me I have the pleasure of a rare long weekend this week.For no apparent reason my school is closed tomorrow and as a result my weekend actually began today .Honestly,I could do a four day week every week.Anyway to kick start my weekend,I decided to whip up something easy yet deliciously decadent.And this chocolate fondant from Lorraine Pascale's book Baking Made Easy is decadence personified.
This recipe is so simple.It contains very few ingredients,most of which you will definitely have on hand.The butter is melted and the finely chopped chocolate is added,melted by the residual heat from the butter.In the meantime the eggs are whipped with the sugar to a mousse like texture.The melted butter and chocolate is then stirred through followed by the flour.The mixture is then divided up between the individual ramekins and popped into the oven to bake.
Looking back now,choosing black plates was a disastrous decision seen as condensation can clearly be seen because of how hot the fondants were,but at the time my mind was probably more preoccupied with getting my teeth into them,than choosing suitable serving plates.

Lorraine's book states that these little babies only take about 10-12 minutes.Now usually I take everything out about 2 minutes earlier then what a recipe states as my oven is like a super oven and cooks everything in about half the time.However,these were different.These actually ended up taking more like 15 minutes to cook but trust me,the wait was worth it.If you don't believe me,feast your eyes on the mouth watering molten centre of the fondant below!
Just look at that volcano of melted chocolate!
Overall,these were delicious and I really couldn't fault the flavour.My only slight alteration for the next time I make them would be to use a darker chocolate with a higher cocoa content,purely just to achieve a darker colour on the sponge.But really it's what's on the inside that counts ;)

Chocolate Fondants
110g(4oz)butter,plus 40g(1 1/2 oz)extra,melted for greasing
1 tbsp cocoa
110g(4oz)caster sugar,plus 1 tbsp extra for coating
110g(4oz)good quality chocolate finely chopped
2 eggs
2 egg yolks
110g(4oz)plain flour

1.Grease 4 dariole mould or ramekins with the 40g melted butter.Mix the cocoa powder and tbsp of caster sugar in a bowl then put this mixture in the mould,tilting and turning them so the mixture sticks to the butter.Tip out any excess.
2.Melt the rest of the butter in a small saucepan over a medium heat.Remove from the heat and add the chocolate and leave to melt.
3.Preheat the oven to 180C(350F)Gas mark 4.Whisk the eggs and yolks in a large bowl until they start to thicken.Then gradually add the sugar in 2-3 additions,whisking all the time.The mixture should become thick,pale and mousse-like.
4.Stir the melted chocolate and butter mixture then gradually pour it into the whisked eggs,whisking all the time.The chocolate is heavy and sinks to the bottom so check none is hiding!Sift in the flour and whisk briefly.
5.Divide the mixture among the prepared moulds and bake for 10-12 minutes(mine took 15).The tops should be firm and the middle should remain molten.
6.Once the fondants are ready,leave to cool for a minute or two,then use oven gloves to place a serving plate upside down on top of the mould.Hold everything together and turn the whole lot over so the plate is now on the bottom.Put the plate on the work surface and gently shake the mould until the fondant plops out.If you find it refuses to come out take a small knife and run it between the mould and the fondant to loosen it a little.
7.Serve with a scoop of vanilla ice cream.

Friday 23 September 2011

TGIF:Chocolate Peanut Butter Tobelerone Cheesecake

Friday,finally.Seriously my favourite day of the week.My usual Friday would go something like this:

Watch clock impatiently as the last few minutes of class go on forever.Bell rings.Bolt out of classroom and fight off the melee of students who crowd around lockers.Get home,fling schoolbag into a corner,bulging with books for a weekends homework.Roll up sleeves,and launch into my chosen recipe.

Nothing sounds better to me frankly than the above statement.This week I had my mind set on making a cheesecake.I toyed with many different flavours,vanilla,lemon,chocolate hazelnut,baileys but just couldn't find a recipe that really called out to me.So I decided to improvise and came up with my own combination for the filling,and boy am I glad I did!Scroll down for a luscious recipe for Chocolate Peanut Butter Tobelerone Cheesecake(unless of course your on a diet...in that case you should probably stop reading.Like now.)

I know when some of you read the combination it will sound overly sweet and chocolaty.But I found that that just wasn't the case.Yes the cheesecake filling itself had quite a rich chocolaty filling but the added peanut butter cut through the chocolate so that it wasn't tooth achingly sweet.The tobelerone was a delicious add in,the little chewy bits of nougat a pleasant surprise  in an otherwise mousse like filling.So if your looking to make a cheesecake with a difference this weekend,give this recipe a second thought before you make your final decision.I'm pretty sure you won't be disappointed ;)

For The Base
100g Butter
200g Biscuits(Digestives,Rich Tea,feel free to play around)

For The Filling
300g chocolate
100g peanut butter
250g full fat cream cheese
250g mascarpone cheese
250ml double cream
250g tobelerone,chopped

1.Start by making the base.In a food processor or using a rolling pin,blitz or crush the biscuits until you have fine crumbs.Melt the butter in the microwave and then add this to the biscuits.Stir to distribute the butter thoroughly.Press the biscuit mixture into an 20cm(8") round springform tin.Place in the fridge to set while you make the filling.
2.Melt the chocolate in a bowl set over a pan of simmering water.Melt the peanut butter in the microwave in 20 second bursts until runny.Allow both to cool.
3.While these are cooling,place the mascarpone,double cream and cream cheese and beat using a wooden spoon until creamy and combined.
4.Add the melted chocolate and about three quarters of the melted peanut butter,reserving some to create the swirled effect on the top.Stir to combine making sure the mixture is uniform and the one colour.Add the chopped tobelerone and fold through.
5.Spoon the mixture into the tin and level the top off with a spatula.Pour the reserved peanut butter over the top in a swirled pattern.Place in the fridge to set for at least 2 hours.
6.Once ready to serve,remove the cheesecake from the fridge for about 15 minutes before serving to make it easier to cut.


Friday 16 September 2011

Chewy Speculaas Blondies

Ah Friday,finally!I was having one of those weeks where it just seems to drag by and when Friday feels like it's never going to come.As soon as the bell rang to signal the end of school today I bolted out of the door and headed for home.I love weekends.Weekends allow you to do the things which you want to do during the week but never have the time or energy for.One such example is baking.As is probably quite obvious to anyone who has ever even glanced at this blog.I'm unable to pin point just exactly what it is,but I find nothing more relaxing than getting stuck into an exciting new recipe.Therefore,when the weekend finally rolls around I discard my schoolbag and homework and get out my eggs and flour.
As I mentioned in my last post,I recently recieved Edd Kimber's new book,The Boy Who Bakes,in the post.After perusing the book quite thoroughly,I decided to choose a nice simple recipe for a relaxed Friday evening.I chose the Chewy Speculaas Blondies,as I have been wanting to make blondies for quite a while now and the recipe seemed pretty easy.
The recipe comes together very quick.The butter is melted in a pot,the spices are added and then the sugar.I was unfortunately unable to find ground cloves or cardamom anywhere in my area,so I just had to omit them from the recipe(I'm sure they probably would make quite a difference if added).This mixture is allowed to cool before the eggs are whisked in.The flour,baking powder and salt are folded in.Finally the chocolate chunks and hazelnuts are added.The mixture(which I found to be quite stiff)is tipped into the tin and baked in the oven for about 30 minutes(mine baked in about 23-25 minutes).One cooked the blondies are left to cool in the tin for a couple of hours so that they can set and firm up.Now I'm usually one of those people who can't stand waiting around for something to cool or set but luckily today I had to go out for dinner first.This acted as a nice distraction and meant the blondies had time to cool and set properly.

By the time I arrived home the blondies had set perfectly.I removed them from the tin and snapped a few pictures on my(useless) camera with the little natural light still left.I was glad to see the blondies had a beautifully fudgy interior once I cut into them.They really were like a blonde brownie.I decided to dress the blondies up a bit for a dessert and so I attempted to make the salted caramel sauce which was also included in the book.Now I'm not sure exactly what went wrong but once the sauce was cooked it began to harden and became like a chewy toffee more than a sauce.I could also taste very little salt,which is probably down to the extremely small pinch I put in to the sauce but at least I'll no better next time.If anyone had any suggestions as to why the sauce went hard when it began to cool I would be glad to hear them as this is one sauce I'd really like to try again.

I first tried these blondies after I gave them about 30 seconds in the microwave to heat up.I served with a scoop of vanilla ice cream and dug in.I found the taste of these to be quite unusual.The spice present really came through in the blondies and worked nicely with the chocolate.Later on,I tried a small piece of the blondies cold on their own,and found that I actually preferred the blondies like this.Room temperature,unadourned yet still delicious.

I was pleased with how my first batch of blondies turned out and will definitely make these again when I can get my hands on ground cloves and cardamom.In the meantime however,I may just have to make some of the other recipes in this great new book!

Chewy Speculaas Blondies
225g unsalted butter
1 tsp ground ginger
1/4 tsp freshly grated nutmeg(I used dried and reduced the amount)
1/4 tsp ground cloves
1/8 tsp ground cardamom pods
400g light brown sugar
2 eggs
250g plain flour
1/4 tsp salt
1 tsp baking powder
80g chocolate,chopped
80g hazelnuts chopped

1.Preheat the oven to 180C(160C fan)gas mark 4.Grease and line a 23 x 33 cm baking tin and line with a strip of baking parchment,leaving a 5cm overhang along the edges to make removing the blondies easier.
2.Melt the butter in a pan over a medium high heat,add the spices and cook for a couple of minutes.Next add the sugar and cook for a further 5 minutes,stirring constantly before taking the pan off the heat.
3.Leave to cool for 5 minutes.Next whisk in the eggs and fold in the flour ,baking powder and salt.Stir in the chopped chocolate and hazelnuts,then pour the batter into the prepared tin.Bake in the oven for 30 minutes.
4.Once cooked,allow to cool in the tin completely and to set for a few hours in the tin.

Thursday 15 September 2011

Butterscotch Pecan Cheesecake


Today I have a quick post for you with a recipe for Butterscotch Pecan Cheesecake.It's hard trying to find time to update the blog with recipes during the week when I have school and homework,so at the moment I'm really just posting whenever I can.I made this cheesecake last weekend for a relative who was coming to visit.I knew they had a particular soft spot for cheesecake and there was a bunch of cheesecakes I'd been wanting to try.I have made many cheesecakes before but this was the first time I made a baked one.Im delighted I finally decided to make a baked one as I love the texture of a baked cheesecake.This recipe caught my eye,butterscotch and pecans-what's not to like?
I read the recipe and realised that although a simple enough cheesecake to make,it was time consuming.To be honest this cheesecake would really have to be made the day before you actually want to eat it,or at least very early that morning.But if you keep that in mind then this really is a very easy cheesecake to make.
The cheesecake begins with a regular biscuit crumb crust.The filling is a combination of cream cheese,sugar,egges and chopped pecans.The glaze combines butter,light brown sugar,milk,vanilla essence and icing sugar to create that delicious butterscotch flavour.
I thought this cheesecake wasy quite tasty.The pecans were a nice crunchy contrast to the smooth creamy filling and the glaze delivered with a real butterscotch flavour.One thing which I noted is that I think I may have baked the cheesecake for slightly too long.The recipe stated the the middle should have a slight wobble when it was cooked and looking back now I'm pretty sure there was no wobble in the centre of mine when I took it out of the oven.Overbaking the cheesecake made the filling suffer slighly I think,making it more dense and less creamy than I would have liked.Also I think I should have whisked the glaze for slightly longer to make it smoother.If it was smoother I think it would have set nicer on the cheesecake and gave it a more polished finish(So if your being put off by my rather useless photography skills,please don't be-I promise it looks better in the picture in the book!).


For The Biscuit Base
220g(8oz)digestive biscuits
100g(3 1/2oz)melted unsalted butter

Cheesecake Filling
700g(1 1/2 lb)full fat cream cheese e.g.Philadelphia
120g(4oz)caster sugar
1 tsp vanilla essence
3 large eggs
80g(3 oz)pecans,finely chopped plus 10-12 pecan halves to decorate

Butterscotch Glaze
60g(2oz)unsalted butter
45g(1 1/2 oz)soft light brown sugar
2 tbsp whole milk(I used skimmed)
120g(4oz)icing sugar
1 tsp vanilla essence

One 20cm(8in)diameter spring form cake tin

1.Line the base of the cake tin with baking parchment then,in a food processor,whiz the digestive biscuits into fine crumbs using the blade attachment.This could also be done by placing the digestive biscuits in a bag and bashing with a rolling pin.
2.Place the biscuit crumbs in a bowl,add the melted butter and mix together with a spoon.Pour the buttery crumbs into the lined cake tin and press them into the base of the tin.Place in the fridge for 20-30 minutes to cool and set.
3.Meanwhile,preheat the oven to 160(320F) Gas mark 3 and prepare the cheesecake topping.
4.Using a hand held electric whisk or a freestanding mixer with the paddle attachment,mix together the cream cheese,sugar and vanilla essence on medium speed until smooth.Add the eggs one at a time,mixing thoroughly after each addition and scraping down the sides of the bowl.Stir in the chopped pecans by hand and then pour the cheesecake mix onto the chilled biscuit base.
5.Wrap the cake tin in foil(I did a couple of layers)this prevents water from the water bath getting into the cheesecake.Place the wrapped cake tin in the roasting tin and fill the tin with water to about 5mm(1/4 in)from the top of the cake tin.This creates a water bath for the cheesecake to bake in,which will prevent the top from cracking while it bakes.Place in the oven and bake for 35-40 minutes or until the cheesecake is a light golden colour,especially around the edges,firm to the touch and with only a slight wobble in the middle.
6.Allow the cheesecake to cool down at room temperature while still in the tin,and then place in the fridge to set for a few hours.
7.When the cheesecake is fully chilled make the butterscotch glaze.Put the butter,sugar and milk in a small saucepan and bring it to a boil.Remove from the heat,stir in the icing sugar and vanilla essence,then whisk until the glaze is smooth.
8.Pour the glaze on top of the cheesecake and decorate using the pecan halves.Place in the fridge to set for a few hours or overnight if possible.Remove from the cake tin before serving.

P.s. The winner of last years Great British Bake Off,Edd Kimber,has just released his new book.I got it delivered the other day and it looks great!Expect to be seeing a few of his recipes being tried here in the next few weeks :)

Sunday 11 September 2011

Mini Strawberry Daiquiri Cupcakes

So this past week or two has been pretty busy hence the general lack of posts.I'm back in school and getting more homework than ever and it's only the second week!Coming home from doing a full day of school and then having to launch into doing a full nights homework leaves little time for much else.This means less time for baking.At the moment the weekends are the only time I really have to bake.Therefore by the time Friday evening comes,I'm only itching to get my hands into a delicious new recipe(I'm sure I'm not the only one out there who experiences this).
Next week is going to be hectic once again.The results of my Junior Cert exams will be coming out on wednesday(god help me!).Then on Saturday I have been asked to make something for a relatives big birthday party.She's asked me to make some form of a sweet or dessert for roughly 50 people.No pressure now.I was trying to come up with suitable recipes for ages but nothing seemed right.I knew she would be ordering a big cake herself so a cake itself was out of the question.Then,while flicking through my much loved Hummingbird Bakery book,I hit upon the perfect recipe(actually recipes!).I saw the recipes for these mini alcohol based cupcakes and knew instantly they were just right.They look absoulutely adorable,they taste delicious and also they are slightly more sophisticated than your average cupcake as they contain alcohol.This combination of factors makes me think these will be perfect for an adults party.
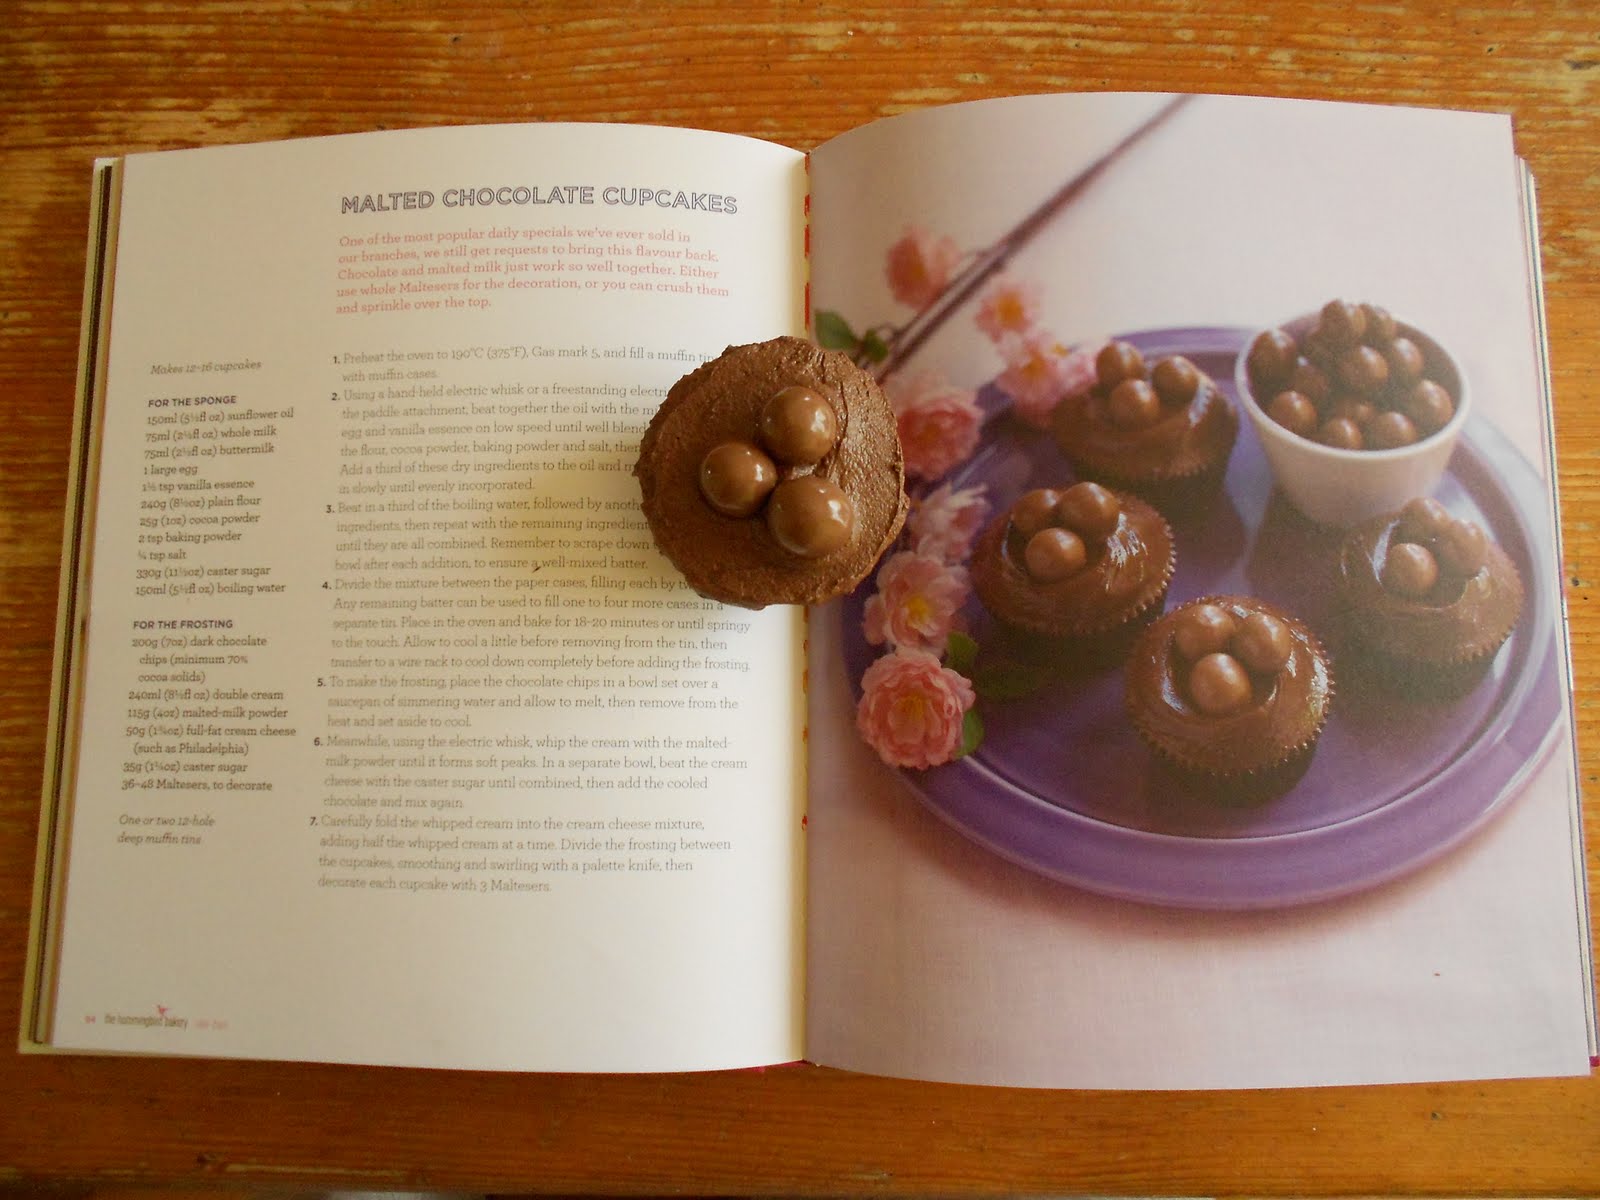
Just before I begin the next paragraph,please excuse the shoddily iced cupcake above,I had much better ones and really don't know why I chose to photograph this one but anyway..

So last Friday with the pending party in mind,I set about trying out one of the recipes for the alcohol flavoured mini cupcakes.I chose the strawberry daiquiri ones as my mam loves strawberry daiquiries.The recipe comes together pretty easily really.The most time consuming bit is waiting for the strawberries to soak in the rum reduction.The recipe says to soak the strawberries for about 30 to 40 minutes.I soaked mine for about 25 and one point I would make is that I found the flavour of alcohol to be very weak in the cupcakes.Therefore I think I would recommend to anyone considering making these,to soak the strawberries for the full 40 minutes to really get that hint of rum.After that the cupcake batter is like any other average cupcake batter.You place a few pieces of soaked strawberry into the base of each mini cupcake liner,spoon over the batter and pop into the oven for 12 to 15 minutes.Once they come out of the oven you spoon over a little of the rum reduction and allow the cupcakes to cool completely.While cooling the icing can be made.Its a pretty basic buttercream but a few teaspoons of the rum reduction are added giving it a lovely strawberry flavour.Once cooled the cupcakes are iced and topped with a sliced strawberry.Very pretty indeed!One thing I should mention is that the recipe states it makes 24-30 cupcakes.I managed to get 48 so keep that in mind!

Now on to the important bit,the taste.I personally didn't think I was going to like these.The main reason for this is that I generally hate alcohol in desserts.Take for example tiramisu or any other dessert which has a strong rum flavour.However,I must say these were honestly delicious.As mentioned above,the flavour of rum is very weak in these but they most certainly taste like a strawberry daiquiri.The fruit in the mixture and the rum reduction spooned over the cooling cupcakes makes for a seriously moist cupcake which is always a good thing.I think these cupcakes are best eaten on the day as after a day or town the sliced strawberry on top begins to look a bit,well,sad.Also the cupcake becomes slightly soggy due to the fruit in the batter.

I've decided I'm definitely going ahead with this recipe for the party(and also one or two others,more to come on them during the week).I'll be sure to put up a post later on in the week letting you know with how I got on making roughly 150(!) cupcakes.
For The Sponge
100 ml(3 1/2 fl.oz) white rum
170g(6oz)caster sugar
150g(5 1/2 oz)strawberries
40g(1 1/2oz)softened,unsalted butter
120g(4 oz)plain flour
1 1/2 tsp baking powder
1/4 tsp  salt
1 large egg
120ml(4 fl.oz)whole milk
1/2 tsp vanilla essence

For The Frosting
80g(3 oz)softened unsalted butter
250g(9 oz)icing sugar
1/2 tsp finely grated lime zest
4 tsp whole milk
Sliced strawberries,to decorate

1.Preheat the oven to 170C(325F)Gas mark 3,and line a mini muffin tin with cases.
2.Add the rum and 30g of the sugar to a small saucepan and bring to the boil,allowing it to reduce by half,then set aside to cool slightly.Hull and chop the strawberries and then add to the rum and sugar reduction.Soak for about 30 to 40 minutes.
3.Meanwhile,using an electrice whisk or freestanding mixer,slowly mix together the butter,flour,remaining sugar,baking powder and salt.Mix until the ingredients have come together and resemble breadcrumbs.
4.In a jug whisk together the egg,milk and vanilla essence.With the mixer or electric whisk on low speed,gradually pour the liquid mixture into the flour and butter mixture thoroughly.
5.Drain the strawberries from the rum reduction,reserving the liquid.Place a few small pieces of strawberry in each cupcake case.Spoon the cake batter over the strawberries,filling each case about 2/3 full.
6.Bake for 12-15 minutes or until the cupcakes are a light golden brown colour and bounce back when pressed lightly.While they are still warm,spoon about 1/2 teaspoon on the rum reduction over each cupcake and allow to cool completely before frosting.
7.Using a freestanding mixer or electric whisk,set on low speed,beat together the butter,icing sugar and lime zest,until combined and crumb like in texture.Now mix together the milk and 4 teaspoons of the rum reduction in a jug.Pour this into the butter and icing sugar still mixing on a low speed until incorporated.Then increase the speed to high and best the frosting until soft and fluffy.
8.Smooth the icing on the cupcakes using a palette knife.Top with sliced strawberries to decorate.

Saturday 3 September 2011

Brown sugar,ginger and pecan cake with peaches.

I don't know about you but I don't really like fruit.On the other hand I love vegetables but I just never really liked eating fruit say,for a snack.I don't know if it's because maybe here in Ireland supermarkets don't stock really ripe,good quality fruit.The only way I usually eat fruit would be in desserts.Give me a fruit crumble,pie or tart anyday and I will most definitely go back for seconds.That's why it's unusual for me to choose a recipe like this where the fruit isn't actully used or cooked in the dessert but merely to adourn the cake itself.

I think what really persuaded me to make this cake was the images which accompanied the recipe.They were so striking and the colours of the cake were so pretty to look at.The peaches on the top of the cake were also arranged so beautifully that I felt I just had to recreate this cake for myself.My pictures and indeed my cake probably resemble nothing of the original but I was still very pleased with the results.This cake required no fancy piped icing,just simple sliced peaches.

Even though this cake turned out very well,while it was baking I was almost considering not posting about it.See I realised just as the cake went into the oven that I had made a rather huge mistake during the preparation of the cake.Not jus a minor omission of a teaspoon of vanilla extract.No,I had unbelievably doubled the amount of butter required for the cake.You may think that sounds like a very silly mistake to make but the ingredients list gave the butter measurement in cups and when I converted the cup measure to grams I forgot that the cake only required 1/2 a cup of butter!I was so dissapointed and had resigned myself that the cake was never going to work.However,I left it in the oven just to see what would happen and amazingly enough,the cake turned out fine even if it was a tiny bit sunken in the middle!The frosting covered up the slight dip in the cake nicely and no one was any the wiser.This cake required that you use fresh peaches.When I read this I almost decided to use tinned peaches instead as I was worried that I would have a hard time finding really tasty,ripe,juicy fresh peaches.In the end I decided to stick to the recipe and go with the fresh peaches.To be honest I can't really fault this cake.The cake itself was delicious,the extra butter actually added to its flavour and kept it unbelievably moist.The dark brown sugar really came through to give the cake a lovely deep sweetness.The bits of pecan added nicely to the texture.The unusal frosting was delicious and was perfect for the cake.The only slight downfall came where I expected.The peaches I got although not terribly hard,lacked that sweet peach flavour.If I was to make this cake again I would almost certainly use tinned peaches to ensure the peaches were really sweet.As a little extra thought,I also think this cake would work with a lot of other fruits for example,plums.

You can find the recipe here on a great blog called Dessert for Breakfast.The photos are particularly good!

Sunday 28 August 2011

The end of summer & a rhubarb and strawberry crumble

Today is my second last day of summer before I return to school.Most of the year groups are already back in school so I'm enjoying my last few days of freedom.Looking back now,at the start of summer I felt like I would never have to return to school.However,gradually the days stretched into weeks and summer has sadly come to an end.The end of summer also means an end to many fruits and vegetables.For this reason I decided to choose some of these fruits to bake with for the last time this summer.I found this delicious recipe for Rhubarb & Strawberry Crumble in Donal Skehan's new cookbook.This recipe is an excellent use for the last batch of strawberries and rhubarb of the summer.
During cooking,the strawberries and the rhubarb release their juices and form a thick,syrupy liquid which complements the crisp,crumbly topping.The addition of jumbo porridge oats gives the topping a very satisfying crunch too!This crumble is deliciously fruity and light,perfect for an end of summer dessert.If you are looking for something delicious and easy to make,then I suggest you give this crumble ago before strawberries and rhubarb dissapear off the shelves of shop altogether.


This crumble was delicious served with a heaping scoop of vanilla ice cream or even just whipped cream.I know my pictures don't do this crumble any favours but forgive me as a crumble is not the easiest thing to present or make look beautiful.

Rhubarb & Strawberry Crumble
Topping
200g(5 oz) plain flour
100g jumbo oat flakes
175g(6 oz) soft light brown sugar
200g(7 oz) cold butter,cubed

Filling
600g(1 lb 4 oz) fresh strawberries,hulled & halved
5 medium stalks of rhubarb
1 tbsp plain flour
60g(2 1/2 oz) soft light brown sugar
juice of half a lemon

To Serve
Fresh cream,whipped
Vanilla ice cream

1.This first step is optional and is not included in Donal's recipe in his book but I always do it no matter what crumble I'm making.Chop the rhubarb into 2.5cm(1 in) pieces and place in a pot.Add a small amount of water to the rhubarb and place over a medium heat to soften slightly for a few minutes.
2.Preheat the oven to 190C(375F),Gas mark 5.
3.Place the flour,oats,soft light brown sugar and butter in a large bowl.Using your finger tips rub the ingredients together until the mixture resembles chunky breadcrumbs.
4.In a large baking dish,toss the strawberries,stewed rhubarb,juice of half a lemon,tbsp of flour and sugar together.Now spread the crumble mixture evenly over the top.
5.Place in the oven for 25-35 minutes until the crumble topping is golden brown and the fruit is soft and bubbling beneath.Serve with either whipped cream or vanilla ice cream.


Wednesday 24 August 2011

Chocolate cake for a birthday


It was my dad's birthday a few days ago and I was in charge of making the cake as usual(not that I mind).I wanted to make a larger cake to give the day a bigger sense of occasion,so I settled for a three layer chocolate and caramel cake.I have had my eye on this recipe for a while now and have been only waiting for a reason to make it,so this seemed like the perfect oppurtunity!The recipe comes once again from The Hummingbird Bakeries new cook book,Cake Days.I only recently bought this book and so at the moment most of my posts are based on recipes out of the book.The recipe in the book is actually for a salted caramel chocolate cake.Now I've heard a lot about salted caramel and what an amazing combination it is and I have been dying to try it.However,my family thought it sounded like an odd combination and seen as I didn't want to have a whole three layer cake to eat for myself,I decided to leave out the salt this time and make a caramel and chocolate cake instead.The description in the book says that "the cake is worth the time spent in the kitchen".I have to say I couldn't agree more.Don't get me wrong;this cake takes quite a while to get finished,but it is a lovely,rich,moreish cake that also looks fantastic once iced.The first stage of the recipe involves making up the caramel filling.This is pretty easy,the only thing you have to watch is to make sure you don't boil the sugar syrup for too long as the caramel can quickly begin to burn(which by the way,burning sugar is the most awful smell!).This is set aside while you make the chocolate frosting.The frosting is probably the most lengthy process in the whole recipe.Firstly,a sugar syrup is made and mixed with bolied cream to make a caramel.Then a massive 450g of chocolate is chopped(my arm was practically falling off me after this)and added to the still warm caramel.This is stirred until it is completely melted.The mixture is then whisked for about ten minutes until the bowl feels cool,after which butter is added.The mixture is whisked again and then put into the fridge to set.Then the chocolate sponges are made.This part of the recipe came together very quickly.The book states that the cakes should be cooked in about 25 minutes.Now usually my fan oven cooks everything about 5 minutes quicker then what the stated time is.However,when I went to check the cakes after 25 minutes I found the the top of the cake were barely set and still completely raw underneath.As a result of opening the oven when the cakes were so raw,I think my cakes fell a bit but that's fine as you wouldn't notice once they are iced.I'd say I gave my cakes an extra 7 or 8 minutes to cook completely.The sponges are then left to cool completely.Once cool 2 tablespoons of caramel are spread over one of the cakes followed by a couple of tablespoons of the chocolate frosting.The remaining layers are placed on top and covered with the caramel and chocolate frosting in the same way.Once this is done a crumb coating is given to the cake,followed by another layer of the frosting.I then swirled the top of my cake with my palette knife and sprinkled chocolate curls on top et voila!Chocolate cake with a caramel filling and chocolate frosting.If anyone would like the recipe please feel free to leave a comment and ask! :)

Monday 22 August 2011

A couple of things I want(but can't have)

I thought I would write a post listing a couple of things(baking equipment etc.)that I would like,but sadly due to a limited income(i.e none)can't have.Maybe once you have read the post you might leave a comment listing a couple of the things you would like but can't have.I think it would be interesting to see some of the things that people come out with!

1.A red Kitchenaid Artisan food mixer:I've wanted one of these for ageess now!I especially love the kitchenaid in the colour.It would make bread making and many other recipes seem much less daunting to attempt.It also wouldn't look too bad sitting on my counter ;)

2.An ice cream maker(preferably a Cuisinart ice cream maker):Lately I have grown a strong liking for ice cream,I particularly love ice cream that has something mixed into it such as chunks of cookies,nuts,marshmallows etc.I have seen some lovely recipes on many food blogs for ice cream and would love to make some of them,yet I feel to achieve best results an ice cream maker would be necessary.

3.A Waffle Iron:I was in a restaurant recently and it came to my favourite part of the meal,ordering dessert.There were many yummy sounding options on the menu such as chocolate fudge brownies,sticky toffee pudding,cheesecake etc.I chose banoffe pie in the end while my mum chose belgian waffles.When reading the dessert menu I never even gave the belgian waffles a second thought as I didn't really think they sounded all that amazing.The desserts came to the table and I immediately knew my mum had made the better choice.My dessert consisted of a slice of very average banoffe pie.In fact it was exactly how I don't like my banoffe pie i.e far too much bland tasting cream and not nearly enough caramal/bananas/biscuit base.My mum's dessert on the otherhand was a whole other story:Two warm,plump fluffy waffles,piled one on top of the other on a plate smothered with just the right amount of warm maple syrup,dusted with icing sugar and served with a big scoop of vanilla ice cream.I tasted the waffles and could hardly stop myself taking bite after bite.Ever since that,I have wanted a waffle maker in the hope that I might be able to recreate waffles like the ones in the restaurant.


4.Baking From My Home To Yours by Dorie Greenspan:I spend a large portion of my time on the laptop looking at the website Tuesdays With Dorie.It's a baking group consisting of a large number of food bloggers.Each week one of the food bloggers chooses a recipe from the book and everyone in the group makes it and documents how they got on making the recipe.I think that this was a brilliant idea and I am dissapointed that the group is now closed.However,from what I have seen this book has some very delicious recipes and I will definitely be buying this one soon.

Well that's my wish list for the moment,feel free to leave a comment with your wishes! :)

Chocolate Cupcakes With Malteasers

Yesterday I decided I wanted to make something quick and easy so I settled for cupcakes from Cake Days.As you can see in the picture the cupcakes I made look sort of like the malted chocolate cupcakes from the book but I actually just made another recipe for chocolate cupcakes with a chocolate frosting from the book and decorated it so that they would look like the malted chocolate cupcakes.The main reason I didn't just make the malted chocolate cupcakes was because the frosting called for milk powder which I wasn't totally sure about.I don't recall ever seeing milk powder in my supermarket and I'm not sure exactly what it is(I would be thankful for any comments telling me what it is).I found the recipes very easy to make up.The recipe states that you should get about 12-16 cupcakes from this recipe but I was using smaller cupcakes cakes and therefore I got more like 30 ;)I did however have one or two slight problems with this recipe.The first was that when I took the cupcakes out of the oven they had risen nicely and had nice tops.However after one or two minutes cooling a dip formed in the middle of a good few of the cupcakes.I have absoulutely no idea why this happened as I have made many cupcake recipes before and this has never happened( once again I would be greatful for and comments suggesting what may have went wrong here!).My second problem was that I found that the 50ml of milk used to loosen the frosting wasn't enough so I added a good bit more I would say nearly double,to get an easy to spread consistancy.I thought these cupcakes tasted lovely as did everyone else who had one and I think the decoration of the malteasers was a nice touch.

Chocolate Cupcakes With Chocolate Frosting And Malteasers

Cupcake
80g(3oz) unsalted butter,softened
280g(10oz)caster sugar
200g(7oz) plain flour
40(1 1/2oz) cocoa powder
1 tbsp baking powder
1/4 tsp salt
240ml(8 1/2 fl oz) whole milk
2 large eggs

Frosting
400g(14oz) icing sugar
100g(3 1/2 oz) cocoa powder
160g(5 1/2oz) unsalted butter,softened
50ml(1 3/4 fl oz) whole milk
Malteasers,to decorate

1.Preheat the oven to 190C(375F),Gas mark 5,and line a muffin tin with cases.
2.Using a hand held electric whisk or a freestanding mixer fitted with the paddle attachment,beat together the butter,sugar,flour,cocoa powder,baking powder and salt on a low speed until all the ingredients are well incorporated and resemble fine breadcrumbs.
3.Pour the milk into a jug,add the eggs and whisk together.Pour three quarters of this mixture into the dry ingredients and beat on low speed to combine.Raise the speed to medium and continue to mix until smooth and thick,scraping down the sides of the bowl every now and then.Pour in the remaining milk mixture and keep mixing on a medium speed until all the ingredients have come together and the batter is smooth once again.
4.Spoon the batter into the cases,so that each case is about two thirds full.Put in the oven to bake for 18-20 minutes or until well risen and spring to the touch.Leave to cool slightly before removing from the tin and placing on a wire rack to cool completely before frosting.
5.To make the chocolate frosting,whisk the icing sugar with the cocoa powder and butter on a low speed in a freestanding mixer or using an electric whisk,until the mixture is sandy in consistency.Pour in the milk,still mixing on a low speed,then increase the speed to high and whisk the frosting until soft and fluffy.
6.Once the cupcakes are cool,add the frosting,smoothing and swirling with a palette knife,then decorate with the malteasers.


Thursday 18 August 2011

Carrot & Ginger Cake From Cake Days


I love,love,lovee carrot cake.It is easily one of my favourite cakes to eat!When I saw that there was a recipe for a carrot cake in Cake Days I knew I would have to bake it soon.I then got a request from someone to make a cake and I decided I would make this Carrot & Ginger Cake and see how it turned out.This recipe makes a massive four layer cake and therefore is only really suitable when catering for a large group of people.Alternatively you could half the quantities and make a smaller two layer cake which is what I think I will do when making this for my family.I found this recipe very easy and had no trouble with it at all.When the cakes came out of the oven they smelt divine and I wanted to have a slice right there and then but unfortunately this cake wasn't for me so I couldn't.While the cakes cooled I made up the cream cheese frosting and set it aside while the cakes cooled completely.When the cakes were cool I placed the first one on a plate and spread a small layer of frosting on top.I then placed the next cake on top and spread a small layer of frosting on it.I continued doing this until all four cakes were stacked one on top of the other.I then coated the whole four layer cake with a light covering of the cream cheese frosting.known as a crumb layer.This was suggested in the back of the book as it makes it much easier to frost the cake evenly.When I finished the crumb layer I then spread the rest of the frosting all over the cake and smoothed it out with a palette knife.I added a decorative swirl on the top of the cake using a palette knife as suggest in the book.I finished the cake off by topping with pecans.The cake was whisked away the next morning and as I didn't get to taste the cake myself I can't really comment on its taste.However,I did recieve rave reviews for this cake and was told not a crumb of it remained by the end of the day :P I think I will definitely be making this one again soon so I can taste it.

Carrot Cake
Sponge
450g(1lb) peeled,finely grated carrots
2 tbsp peeled,grated root ginger
80ml(3fl oz) buttermilk
3 large eggs
1 tsp vanilla essence
350ml(12fl oz) vegetable oil
420g(15oz) caster sugar
500g(1lb 2oz) plain flour
2 tsp baking powder
1 tsp bicarbonate of soda
1 tsp salt
1tsp ground cinnamon
1 tsp ground ginger
80g(3oz) pecans,roasted & chopped

Frosting
100g(3 1/2 oz) softened unsalted butter
600g(1lb 5oz)icing sugar
1 tbsp grated orange zest
250g(9 oz) full fat cream cheese
Pecan halves to decorate

1.Roast the pecans by heating over a medium heat in a saucepan for two to three minutes until they start to turn brown.Remove from the pan,chop and set aside.
2.Preheat the oven to 170 degrees C (325F),Gas mark 3,and line 4 20cm(8in) diameter cake tins with baking parchment.
3.Using a hand held electric whisk or freestanding mixer fitted with the paddle attatchment,mix together the carrots,root ginger,buttermilk,eggs,vanilla essence,vegetable oil and sugar until the ingredients are well combined.
4.Sift together the flour,baking powder,bicarbonate of soda,salt and ground spices,then slowly beat these into the egg and carrot mixture,adding the dry ingredients in three batches.Mix well after each addition,scraping down the sides of the bowl.Stir in the chopped pecans into the batter and mix until the cake batter is smooth and even.
5.Divide the batter between the four prepared sandwich tins and bake for about 30 minutes or until the top of each sponge bounces back when lightly pressed.Allow the cakes to cool completely,on a wire rack,while you make the frosting.
6.To make the frosting,using an electric whisk or freestanding mixer fitted with the paddle attatchment,mix together the butter and icing sugar on a low speed until combined but still powdery in consistency.Add the orange zest and cream cheese,increase the speed to medium to high and mix well until the frosting is smooth,light and fluffy.
7.When the sponges feel cold to the touch,spread some of the frosting between each layer and sandwich all four together.Use the remaining frosting to cover the top and outside of the assembled cake,then decorate with the pecan halves.